Hi, I recently broke off from making Christmas cards to make a 60th birthday card, with a stitched number 60 on it. This made me think, why not make a Christmas card, with the same
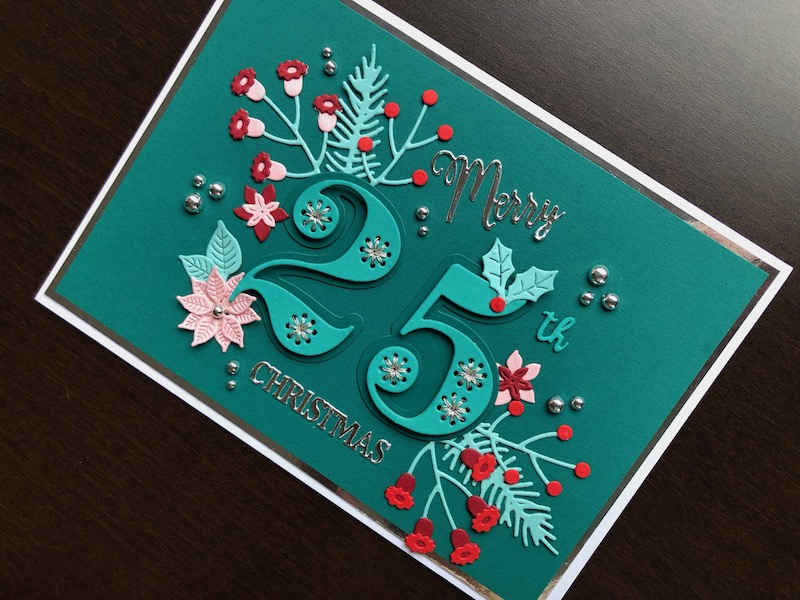
Hi, I recently broke off from making Christmas cards to make a 60th birthday card, with a stitched number 60 on it. This made me think, why not make a Christmas card, with the same design but with a stitched 25th. Here is the result.

To Make The Card
Start with a white 5″ x 7″ blank card and trim it slightly to 12.5cm x 17.5cm, this makes it much easier to cut the layers. Add a layer of silver mirror card and a layer of dark turquoise card. Cut the two number backgrounds from the same dark turquoise card and cut the decorative parts of the numbers twice each from a lighter shade of turquoise. Glue the lighter parts of the numbers together, this helps to make them stronger, which makes the stitching easier. I used silver embroidery thread as that is what I had available but I think it would work just as well with white. Stitch using only three strands of thread, working from the centre outwards around the circle. The metallic thread is quite chunky so I used thin foam pads to adhere the stitched uppers to the bases, adding the pads in the unstitched areas.
Die cut a selection of winter flowers and foliage from pale turquoise, red and pink card and arrange them around the two numbers. When you are happy with the layout glue the flower and leaf stems in place, then glue the numbers over them. Cut the ‘th’ suffix from the same colour card as the number tops. Cut it twice and glue them together to give it more substance, and adhere to the card front just after the number 5. Cut the Merry Christmas sentiment from silver mirror card, snip the connections to separate the two words. Glue the Merry at a slight angle above the number 5 and the Christmas beneath the two numbers, between the flowers. Die cut two small holly leaves from pale turquoise card and a berry from red card. Glue the leaves to the top of the number 5 with the stems crossed and the berry over the crossed stems.
Finish off by adding a small silver pearl to the centre of the poinsettia and different sizes of silver pearls in and around the flowers and leaves. I am very pleased with the way this card turned out, I love the colour scheme as a change from traditional Christmas colours and the touches of silver that just add a bit of shine. I hope you like it too, thank you for visiting, all the products used are linked below.
Products Used
- White 5″ x 7″ blank card and envelope
- Silver mirror card
- Shades of turquoise, red and pink card
- Extendable paper trimmer
- Christmas Blooms die set
- Stitched Numbers die set
- Number Suffixes die set
- Merry Christmas die
- Big Shot die cutting machine
- Metallic silver embroidery thread
- Silver self adhesive pearls
- Double sided tape dispenser
- Dries clear glue
- 1mm adhesive foam pads

