
Hi, The snowy houses and trees on this card are from the new Snow Globe Die Set by Spellbinders, a lovely set which I will be using again to make a card with the full
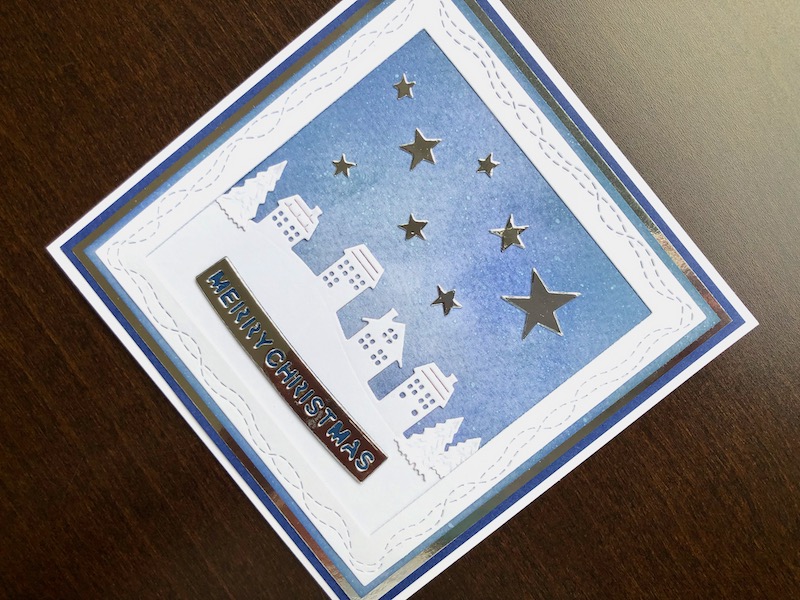
Hi, The snowy houses and trees on this card are from the new Snow Globe Die Set by Spellbinders, a lovely set which I will be using again to make a card with the full snow globe on later. The idea for this card started with me wanting to make something in non traditional colours as I seem to have used a lot of red and green so far this year. I decided to make an inked panel in various blues to be a night sky and this is where I ended up.

To Make The Card
Start with a 15cm x 15cm white blank card and trim it down to 13.5cm square. Add a 13cm layer of dark blue card, and a 12.5cm square of silver mirror card. Cut a piece of watercolour card to 12cm square and use a foam ink blending tool with different shades of blue ink to colour it all over. Mix up the colours and leave some areas lighter than others to look like a night sky. Smooth some white ink on a craft mat, spritz with water and mix with a paint brush. Flick the white ink mix over the background to give a subtle snow appearance. I wanted the snow to be fairly faint to not overpower the stars. Adhere this panel to the card front.
Die cut the row of houses on a hillside from white card stock, leaving about 4cm of card below them to form the hillside. Cut three Christmas pine trees from the same white card. Glue the hillside in place at the bottom of the sky panel and add the trees at either end. Die cut an 11.5cm square frame with wonky stitch lines from white card and adhere over the card front so that there is a narrow border of the sky panel all around the edge. Cut the sentiment from silver mirror card and the backing for the sentiment from dark blue card. Glue them together and adhere to the centre of the snowy hillside. Finally die cut a selection of stars from silver mirror card, with one bigger than all the rest. Glue the stars randomly across the sky area.
I am very happy with the end result, I like the blue, white and silver colour scheme, and although inking the night sky takes a little bit of time the rest of it is fairly quick and easy to put together. Thank you for visiting, I hope you like it too. If you want to make it yourself, all the products used are linked below.
Debbie x
Products Used
- White 15cm x 15cm blank card and envelope
- Dark blue card
- A4 Bright White card
- Watercolour card
- Silver mirror card
- Extendable paper trimmer
- Foam ink blending tool
- Distress ink pads Faded Jeans, Stormy Sky, Blueprint Sketch, Picket Fence
- Snow Globe die set
- Nested Squares with Wonky Stitch Lines die set
- Big Shot die cutting machine
- Swirling Stars die set
- Double sided tape dispenser
- Dries clear glue