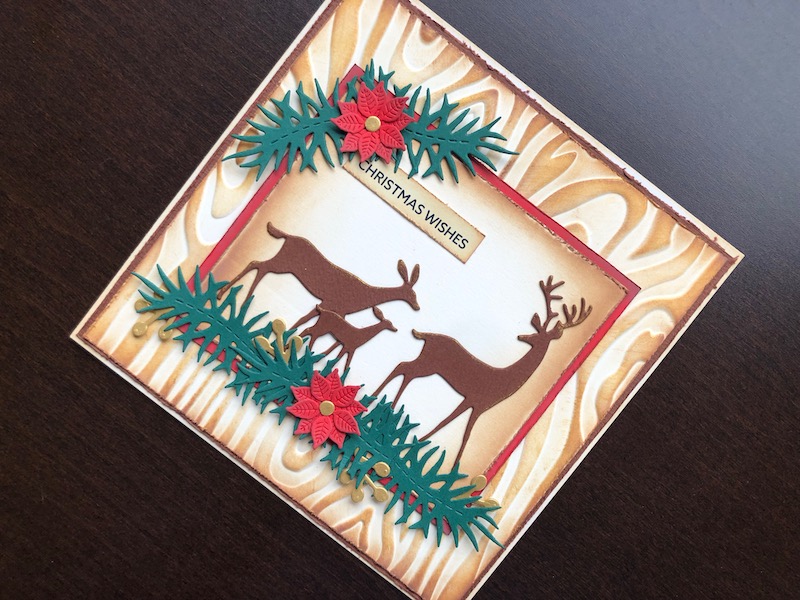
Hi, you could use these deer dies at any time of year but for me they are very Christmassy. I thought the woodgrain embossed background added a nice, rustic feel and some bits of red
Hi, you could use these deer dies at any time of year but for me they are very Christmassy. I thought the woodgrain embossed background added a nice, rustic feel and some bits of red and gold lifted the colour scheme.

To Make The Card
Start with a 6″ x 6″ white blank card, ink around the edges with cream coloured ink. Cut a piece of dark brown card 14.5cm square, roughen the edges with a paper scruffer or scissors and adhere to the card front. Cut a 14cm square of ivory card and emboss with a woodgrain embossing folder. Use a foam ink blending tool to swipe over the raised areas of the embossing with brown ink, then again with gold ink to add a slight shimmer. Roughen the edges, then ink around the edges and adhere the piece to the card front.
Cut a piece of red card 11cm x 9.5cm, roughen and ink the edges, and do the same with a piece of ivory card 10.5cm x 9cm. Glue the ivory card to the red card. Die cut each deer twice and glue them together to give them a bit more body, ink lightly around the edges of each one with a gold ink pad to add some highlights. Position the deer on the ivory card and glue in place. Adhere this panel to the centre of the card front.
Use dark green card to cut 5 pine branches, matt gold card to cut two berry sprays and red card to cut four poinsettias. Ink the edges of the poinsettia petals lightly with brown ink, then glue two layers together to form full flowers. Arrange and glue in place 3 pine branches across the bottom part of the ivory panel. Cut the berry sprays into smaller sprigs and glue 4 pieces in and amongst the pine branches. Carefully cut two gold berries off the remaining stem and use them as the poinsettia flower centres. Adhere one of the poinsettias to the centre of the pine branches below the deer. Cut a Christmas Wishes sentiment from the sheet, ink all over with cream ink, roughen the edges and ink around them with brown ink. Glue to the top left area of the ivory panel. Trim down the two remaining pine branches and glue to the top left corner of the ivory panel, then adhere the last poinsettia where the pine branches join.
Reading back through this it sounds like a lot of work, however, it doesn’t actually take that long. Thank you for visiting, I hope you like the card. If you want to try it for yourself, all the products used are linked below.
Debbie x
Products Used
- White 6″ x 6″ blank card and envelope
- A4 Ivory Foundation card
- Brown and dark green card
- Festive shades A4 card pack – for the red and matt gold card
- Paper scruffer tool
- Extendable paper trimmer
- Foam ink blending tool
- Distress Oxide ink pads Antique Linen, Vintage Photo
- Golden Glitz metallic ink pad
- Woodgrain embossing folder
- Big Shot die cutting machine
- Darling Deer die set
- Christmas Blooms die set
- Traditional Christmas Wordies Sentiment Sheet
- Double sided tape dispenser
- Dries clear glue

