
Hi, I used this Tim Holtz Joy and Noel die set to make this card last year, and liked the look of the die cut Noel decorated with Christmas foliage. I decided to do something
Hi, I used this Tim Holtz Joy and Noel die set to make this card last year, and liked the look of the die cut Noel decorated with Christmas foliage. I decided to do something similar this year but to go a step further and and add a snowy circle background for the die cut word to sit on.

To Make The Card
Cut a piece of white card 12cm x 12cm and position the Confetti Circle stencil in the centre of it. Tape it in place with removable stencil tape. Spread white texture paste all over the stencil, try to get as smooth a finish as possible. Set this piece aside for the texture paste to dry.
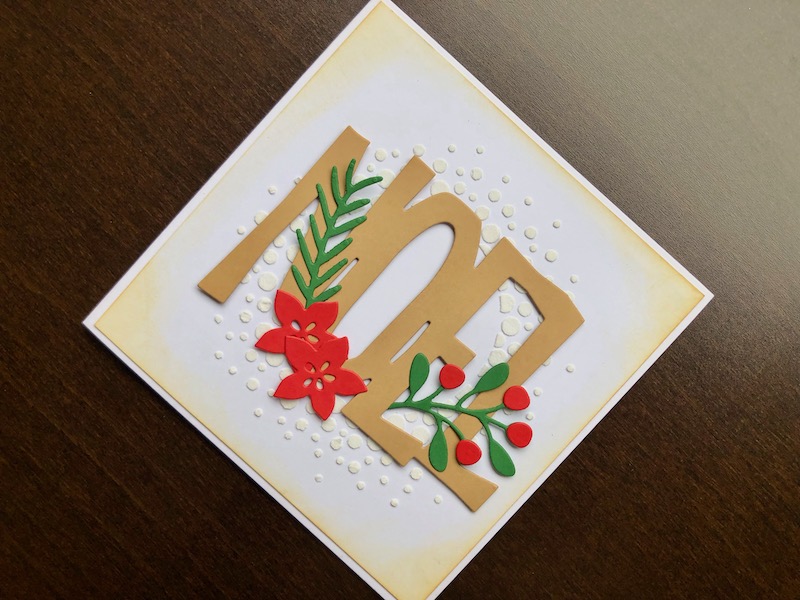
Die cut the word Noel from kraft card, then cut a berry stem, a pine branch and two small poinsettias from red and green card. When the texture paste is dry, lightly ink the edges and corners of the square with light brown ink. Glue the square to the front of a white 5″ x 5″ blank card.
Adhere the Noel to the centre of the card with thin foam mounting pads. Glue the end of the berry stem and tuck it in behind the letter E, glue the pine branch in place on the letter N and glue the poinsettias overlapping at the bottom of the O.
There is no need for a sentiment on this card which makes it a quick make, apart from the texture paste drying time. I like the way it turned out and the kraft, red, white and green colour scheme. I hope you like it too, thank you for reading. All the products used are linked below.
Debbie x
Products Used
- White 5″ x 5″ blank card and envelope
- A4 Bright White card
- Festive Shades A4 card pack
- Extendable paper trimmer
- Confetti Circle stencil
- Stencil tape
- Opaque texture paste
- Big Tidings die set
- Make It Merry Christmas Florals die set
- Big Shot die cutting machine
- Foam ink blending tool
- Antique Linen Distress Oxide ink pad
- Double sided permanent tape dispenser
- Dries clear glue
- 1mm adhesive foam pads