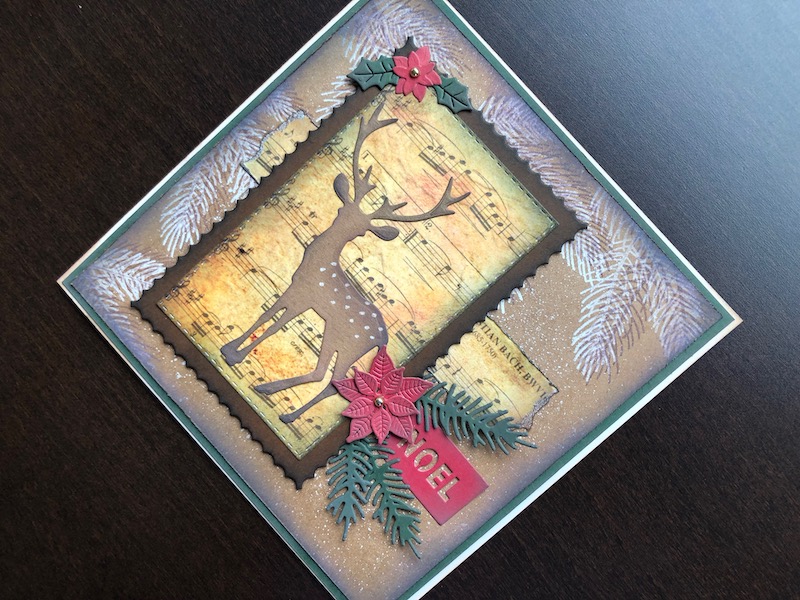
Hi nearly all the Christmas cards I have made this year have been bright and colourful so I decided to try something a bit different and create a darker, more grungy card. I don’t find
Hi nearly all the Christmas cards I have made this year have been bright and colourful so I decided to try something a bit different and create a darker, more grungy card. I don’t find this style of card particularly easy, but I am satisfied with the end result.

To Make The Card
Start by making the shadow stamped background. Cut a piece of kraft card 14cm square, stamp the pine branches on the left side and across the top, in brown ink. Stamp the pine branches again, this time in white ink slightly offset from the brown stamping. This creates the shadow effect. Smoosh some white ink onto a craft mat or other non porous surface and spritz with a little bit of water. Mix the ink and water with a paint brush, then spatter it all over the stamped card. Ink around the edges with brown ink and then again with black ink. Finally run around the edges with a paper scruffer to rough them up a bit. Cut a piece of dark green card 14.5cm square, ink the edges with brown ink and adhere the stamped panel over it.
Use a 7.5cm x 11.5cm rectangle with inverted scallop edge to cut a piece of dark brown card, ink the edges with black ink. Use a 6.5cm x 10.5cm stitched rectangle die to cut a piece of vintage music paper, cut aother piece 2.5cm wide and tear the ends to make it approximately 11.5cm long. With a foam ink blending tool, pounce Fired Brick ink randomly over both pieces of music paper. Roughen the long edges of the strip and ink around both pieces with black ink. Adhere the music rectangle over the dark brown card.
Die cut the stag from craft card, and add white spots to its back with a Gelly Roll pen. Ink around the edges with brown ink and then with black ink on the antlers, ears, feet and tail to give them extra definition. Glue the stag to the music panel. Die cut two sizes of dark red poinsettia, three dark green pine branches, two dark green holly leaves and a dark red Noel sentiment. Ink all these pieces with brown ink. To assemble the card, adhere the music strip horizontally about two thirds of the way up the card and nearer to the left edge. Use thin foam pads to adhere the reindeer panel and raise it over the music strip. Glue the two layers of each flower together and add a gold self adhesive gem to the centre of each. Glue the small flower and the holly leaves to the top left hand corner of the music panel and the larger flower, pine branches and sentiment on the right hand side just below the music strip. Take a white 6″ x 6″ blank card and ink around the front edges with brown ink. Adhere everything to the card front. Although the colours are quite dark, the lighter music pieces and the red flowers and sentiment stop it from being dull. Thank you for visiting, I would be interested to hear your thoughts on this card, if you would like to leave a comment below. All the products used are linked below.
Debbie x
Products Used
- White 6″ x 6″ blank card and envelope
- Dark green, brown and dark red card
- A4 Kraft card stock
- Extendable paper trimmer
- Vintage Music 6″ x 6″ paper pad
- Nested Stitched Rectangles die set
- Nested Rectangles with inverted scallop die set
- Winter Wonderland die set
- Christmas Blooms die set
- Christmas Panel Sentiments die set
- Big Shot die cutting machine
- White Gelly Roll pen
- Foam ink blending tool
- Mini Pine Branch clear stamp set
- Distress Oxide ink pads Vintage Photo, Black Soot, Fired Brick
- Distress ink pad Picket Fence
- Paper Scruffer tool
- Gold self adhesive gems
- Dries clear glue
- 1mm adhesive foam pads

