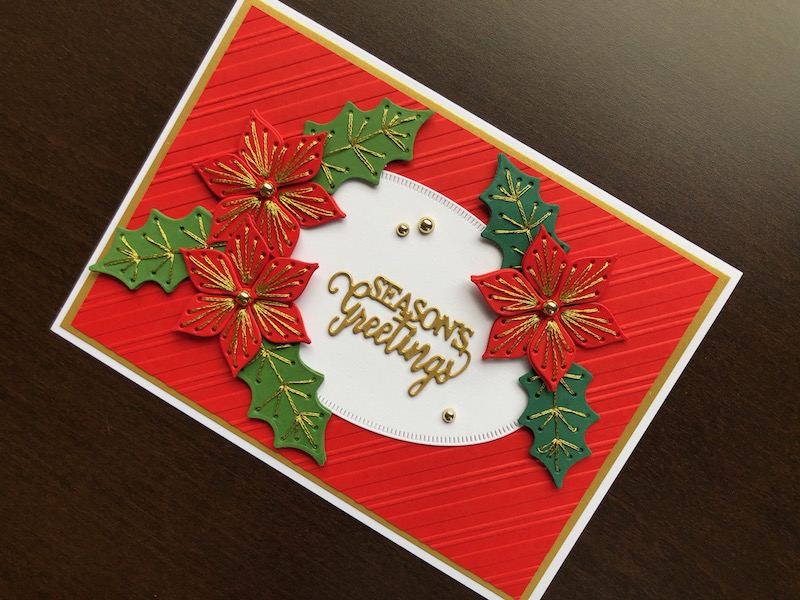
Hi the design of this card is fairly classic and the colour scheme is definitely traditional Christmas. What makes it a bit different for me is that it is the first time I have made
Hi the design of this card is fairly classic and the colour scheme is definitely traditional Christmas. What makes it a bit different for me is that it is the first time I have made a card with stitching on. I think the end result looks fabulous and will definitely be doing more of it.

To Make The Card
Start with a white 5″ x 7″ blank card and trim it down to 12.5cm x 17.5cm, this makes it easier to measure the layers. Add a layer of matt gold card 12cm x 17cm, then cut a piece of red card 11.5cm x 16.5cm. Emboss the striped design onto the red card and adhere over the gold layer. Die cut an oval with small stripes edging sized 7.5cm x 10.5cm from white card stock and adhere to the centre of the card.
Now to make the flowers and leaves. Each flower and leaf has two layers, a solid layer and a layer with the stitch holes. Cut three each of the poinsettia layers from red card. There are two sizes of holly leaf, cut three each of the larger leaf from green card and two each of the smaller leaf from a darker green card. Thread a needle with two strands of metallic gold embroidery thread and pull the thread almost all the way through the first hole. Turn the flower or leaf over and use a small piece of tape to tape down the ends of the thread. Now follow the stitch lines and holes until they are all filled in, tape down the ends of the thread and trim off any excess. The leaves can be stitched in one go but I found it easier to stitch each petal of the flowers separately. This is quite time consuming but I definitely got quicker as I went along. When all the stitching is complete, adhere the stitched pieces to the plain backs.
Arrange the flowers, two on one side of the oval and one on the other. Add the three larger leaves around the two flowers and the two smaller leaves either side of the single flower. Glue them all in place. Die cut the Seasons Greetings sentiment twice from matt gold card and glue on top of one another, then adhere in place in the space on the oval. Add gold pearl to the centre of each flower and a couple above and below the sentiment on the white oval.
I am so happy with the way this card turned out. The stitching, and the double layers of the flowers and leaves makes them look very full and rich. Thank you for visiting, I hope you like the card too. All the products used are linked below.
Debbie x
Products Used
- White 5″ x 7″ blank card and envelope
- Festive Shades A4 card pack
- Extendable paper trimmer
- Peppermint Stripes embossing folder
- Big Shot die cutting machine
- Nested Ovals with Small Stripes Edging die set
- Stitched Poinsettia and Holly die set
- Seasons Greetings die set
- Gold metallic embroidery thread
- Gold adhesive pearls
- Double sided tape dispenser
- Dries clear glue

