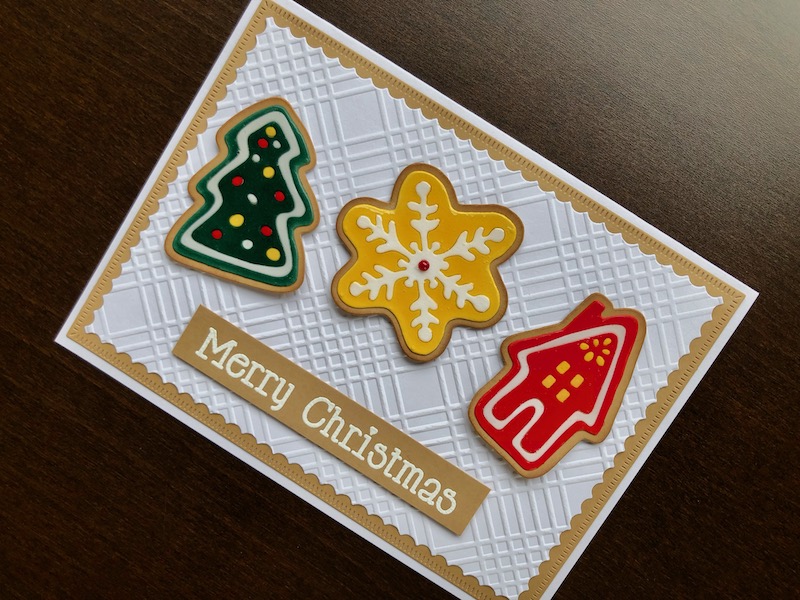
Hi, here’s a fun Christmas card with delicious looking iced Christmas cookies. The Christmas cookies die set came out a couple of years ago, but this is the first time I have used it. Each
Hi, here’s a fun Christmas card with delicious looking iced Christmas cookies. The Christmas cookies die set came out a couple of years ago, but this is the first time I have used it. Each cookie shape has multiple dies that allow you to create the different coloured layers.

To Make The Card
It’s best to start by making the cookies as the glossy accents that create the lovely sheen take time to dry. Cut each base layer from tan coloured card and ink the edges slightly with brown ink to give a baked look. You will need to cut the upper layers of each cookie a couple of times to get the different colours, I chose red, white, green and yellow for the colour scheme but of course you can have whatever colours you want. Adhere the coloured layers to the bases and fill in all the tiny piece, this is a bit fiddly but well worth it. Once all the pieces are glued down add a layer of glossy accents to the surface of each one, only covering the coloured areas and leaving the tan parts matt. Gently prick any air bubbles in the glossy accents with a pin, then set aside to dry.
Take a white 5″ x 7″ blank card and trim it down to 11cm x 15cm, so that it has the same proportions as the die cut layers. Die cut a rectangle of tan card 10.5cm x 14.5cm, with a striped edge and add to the card front. Cut another rectangle, this time from white card and with an inverted scallop edge to 9.5cm x 13.5cm, dry emboss this with a criss cross design and adhere over the tan layer. Cut a strip of tan card, stamp the greeting in watermark ink and heat emboss with white embossing powder.
Once the cookies are dry (this may take up to 24 hours) you can assemble the card. Add a small red pearl to the centre of the snowflake cookie, then adhere all three across the card front using thin foam pads. Again with thin foam pads, adhere the sentiment strip below the cookies. As I mentioned some bits of the cookies can be a bit fiddly but apart from that this card is very easy to put together. The embossed layer adds good texture and the colours are bright. I hope you like it, if you want to try it for yourself, all the products used are linked below. Thanks for visiting.
Debbie x
Products Used
- White 5″ x 7″ blank card and envelope
- Green, red, yellow and tan coloured card stock
- A4 Coconut White Foundation card stock
- Extendable paper trimmer
- Christmas Cookies die set
- Nested Rectangles with small stripes egde die set
- Nested Rectangles with inverted scallop edge die set
- Big Shot die cutting machine
- Diamond Plaid embossing folder
- Essential Festive Sentiments clear stamp set
- Watermark ink pad
- Stamp positioning tool
- Opaque Bright White embossing powder
- Heat gun
- Glossy Accents
- 3mm Red self adhesive pearls
- Dries clear glue
- 1mm adhesive foam pads

