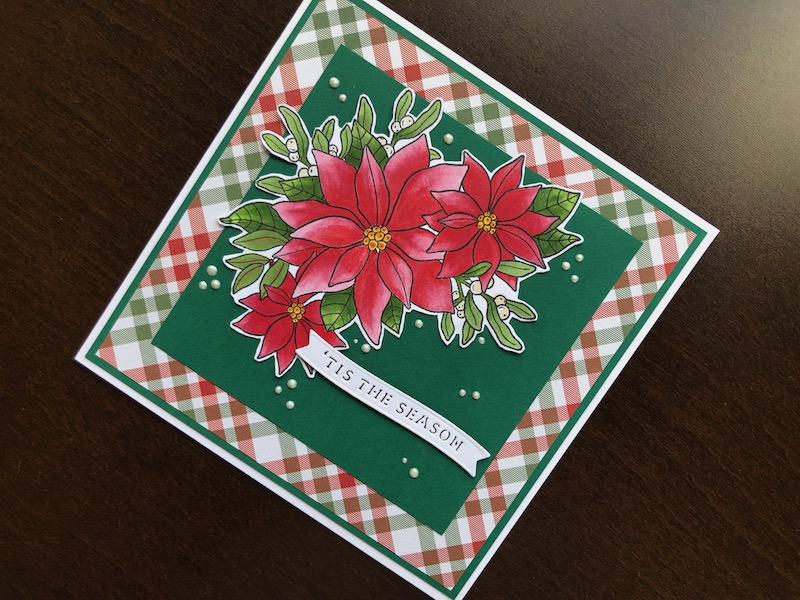
Hi, I love poinsettias on Christmas cards and usually die cut them but I was keen to try out this new Poinsettia stamp set and do some relaxing colouring. I opted for classic Christmas colours
Hi, I love poinsettias on Christmas cards and usually die cut them but I was keen to try out this new Poinsettia stamp set and do some relaxing colouring. I opted for classic Christmas colours of red white and green, which worked perfectly with the tartan background paper.

To Make The Card
Start with a white 6″ x 6″ blank card and trim it down to 14.5cm square. Add a layer of green card 14cm square and a layer of tartan paper 13.5cm square. Cut another piece of green card, 11cm square and adhere to the middle of the card. Stamp the poinsettia group on white card with black ink. Colour the stamped image with alcohol ink pens or your preferred colouring instrument. Fussy cut the stamped and coloured poinsettias and adhere to the top left hand area of the green square. Die cut the sentiment from white card, and adhere in the bottom right hand area of the green square with thin foam pads. Add dots of white pearl accents around the stamped image and the sentiment to finish off. Set aside until the pearl drops are completely dry.
I am very pleased with this card, it is not difficult to make but the colouring takes a bit of time. Thank you for visiting, I hope you like it too. All the products used are linked below.
Debbie x
Products Used
- White 6″ x 6″ blank card and envelope
- Green card
- Tartan 6″ x 6″ Essential paper pad
- Extendable paper trimmer
- Poinsettias clear stamp set
- Stamp positioning tool
- Memento Tuxedo Black ink pad
- Spectrum Noir Classique alcohol ink marker pens
- Make It Merry Christmas sentiment die set
- Big Shot die cutting machine
- White pearl accents
- Double sided tape dispenser
- Dries clear glue
- 1mm adhesive foam pads

