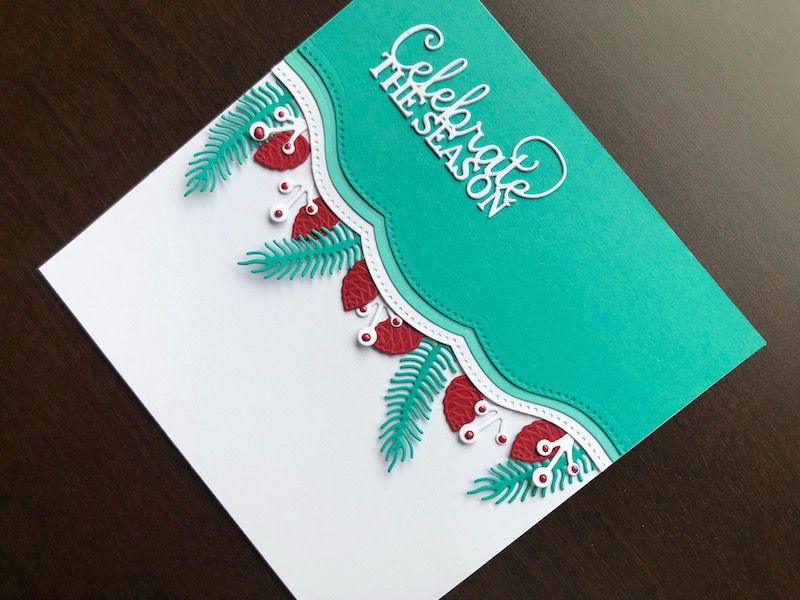
Hi, the last two Christmas cards that I made were in classic Christmas red, green and white, so for my next one I wanted to use a non traditional colour scheme. I have still used
Hi, the last two Christmas cards that I made were in classic Christmas red, green and white, so for my next one I wanted to use a non traditional colour scheme. I have still used red and white but replaced the green with turquoise which I think works well and gives a modern look to the card.

To Make The Card
Start with a white 6″ x 6″ blank card and trim it down to 14.5cm square, this makes it much easier for measuring layers etc. Cut a piece of white card 14.5cm wide and approximately 7.5cm high, cut the bottom edge with the dotted edge die from the Scalloped Borders 2 die set. Cut light turquoise card 14.5cm wide and approx. 7cm high and cut the bottom edge with the plain die from the same set. Repeat the process with darker turquoise card, cut it the same width, slightly shorter and use the dotted edge die again this time. Layer these three pieces across the top of the card, adhere in place with double sided tape, leaving the bottom scallops unglued so that the foliage can be tucked underneath.
Next die cut four pine branches from dark turquoise card, 6 pine cones from dark red card and 5 berry sprays from white card. Add a drop of Berry Red Pearl Accents to each of the berries on the stems and leave to dry. Die cut the sentiment from white card, twice and glue on top of one another to give extra dimension. Adhere this to the top left area of the dark turquoise layer. Once the Pearl Accents is dry arrange the foliage across the bottom edge of the scalloped piece then glue in place tucking the ends under the scalloped edge.
I am really pleased with the way this turned out, I love the colours and the simple decoration. Thank you for calling in, I hope you like it too. All the products used are linked below.
Debbie x

