Hi, I have never made a retirement card before, so when we got the new Happy Retirement stamp set in stock, I thought it was about time I did. I wanted a theme and colour
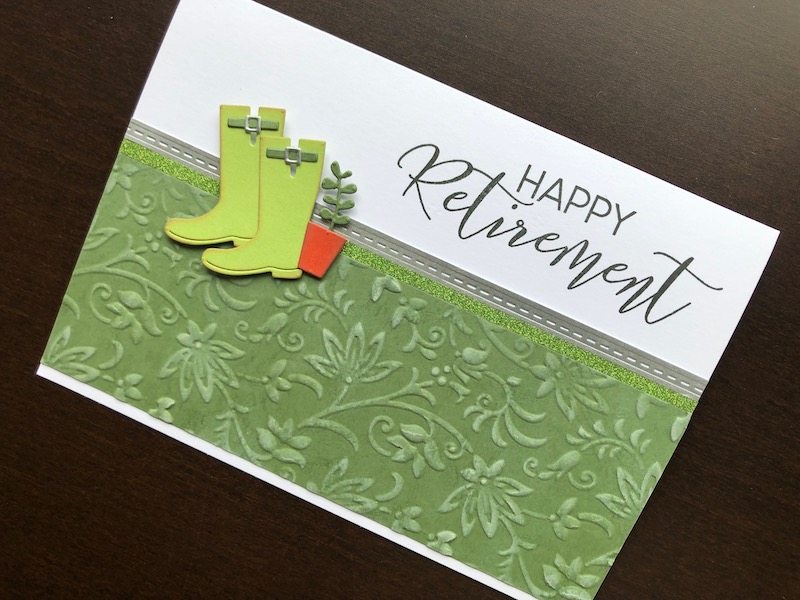
Hi, I have never made a retirement card before, so when we got the new Happy Retirement stamp set in stock, I thought it was about time I did. I wanted a theme and colour scheme that would suit both male and female recipients. With that in mind I chose a gardening theme and a mainly green colour scheme.

To Make The Card
Start with a white 5″ x 7″ blank card. As the card size is in inches I will continue in inches for the other measurements. Cut a piece of dark green card, approx. 7.5″ x 4″, emboss this with the Floral Vines embossing folder. Use a foam ink blending tool to lightly swipe white ink across the raised areas of the embossing to give them extra definition. Trim the embossed piece to 2.75″ x 7″ and adhere to the tent fold card base, leaving a small margin before the bottom both the card. Cut a narrow strip of green glitter card approx 1/8th inch wide and 7″ long. Adhere this immediately above the embossed panel. Cut a strip of matt silver card approx. 1/4″ wide and 7″ long. Use the Stitch Lines die to add a line of faux stitching to the strip. You will need to die cut the stitches twice as the strip is longer than the die, but the join can be concealed under the Wellington boots. Adhere this strip above the glitter card strip.
Die cut two Wellington boots from light green card, two straps from dark green and two buckles from silver. Glue the straps and buckles onto the boots, and ink around the edges with brown ink. Cut out a small plant pot from orange card and a leafy stem from dark green. Ink the edges of the plant pot and adhere the foliage in place. Glue one boot slightly overlapping the other with the plant pot attached to the edge of the right hand boot. Adhere the whole thing to the card, to the left side across the embossed panel and strips, make sure to cover the join in the stitches. Finally stamp the Happy Retirement sentiment in black directly onto the white card in the top right hand area.
I wanted to keep the decoration to a minimum so that the card would appeal to both sexes, you could easily change the colours and add more bling based on a specific recipient. Thank you for visiting, I hope you like the card. Feel free to leave a comment to let me know what you think. All the products used are linked below.
Debbie x
Products Used
- White 5″ x 7″ blank card and envelope
- Card stock, dark green, light green, orange.
- Festive Shades A4 Card Pack (for the silver card)
- A4 No Shed Glitter Card Cool Tones
- Floral Vines 3D embossing folder
- Foam ink blending tool
- White pigment ink pad
- Garden Shed die set
- Big Shot die cutting machine
- Distress Oxide ink pad, Vintage Photo, Black Soot
- New Job and Retirement Sentiment clear stamp set
- Press to Impress stamp positioning tool
- Cosmic Shimmer Dries Clear glue
- 1mm adhesive foam pads

