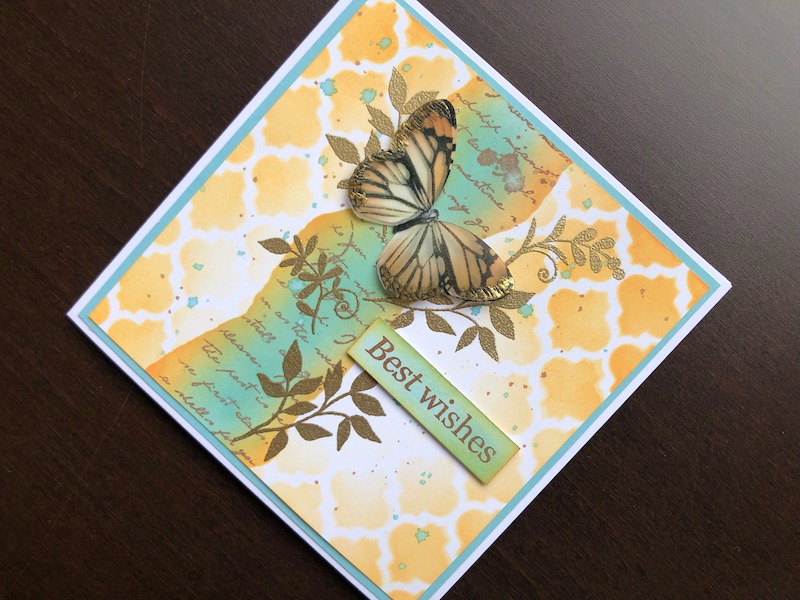
Hi although there are a few different techniques involved with this card, it is not difficult to make, and I love the final result. I used a Best Wishes sentiment but you could change that
Hi although there are a few different techniques involved with this card, it is not difficult to make, and I love the final result. I used a Best Wishes sentiment but you could change that to adapt the card to many different occasions.

To Make The Card
Start with a 12.5cm square white blank card and layer it with turquoise card. Cut a piece of white card 11.5cm square, then tear two pieces of low tack adhesive tape and stick them to the white card with a gap between them. This will mask off the area where you do the ink blending. Use a foam ink blending tool to add Fossillized Amber down the edges of the tape, then Broken China down the middle. Finally use Spiced Marmalade again down the edges and blending into the Broken China. With the masks still in place stamp the Old Letter text in Vintage Photo.
Remove the masks, then again with low tack tape fix the card to your work surface and fix the stencil in place over one half of the card. Use Spiced Marmalade through the stencil making it darker towards the corners and lighter towards the centre. Move the stencil to the other half of the card and repeat the process. Smoosh some Broken China ink onto a craft mat and spritz it with water, dip a paintbrush into the ink and spatter it over the card. Repeat this process with Vintage Photo. Once the ink spatters are dry stamp the leafy stems, and heat emboss with gold embossing powder.
Stamp the butterfly in black ink twice, once on white paper and once on vellum, and die cut them out. Colour both of these with an orange marker pen or pencil, it’s best to colour the vellum on the reverse side to give a softer look. Use a Versamarker pen to scribble a border of lines around the edges of the vellum wings and heat emboss with gold embossing powder. Adhere the vellum layer over the paper layer and fix in place on the card with some ultra high bond double sided tape. Cut a strip of white card to fit the sentiment stamp and ink it with Broken China then go around the edges with Spiced Marmalade. Stamp the greeting in Vintage Photo and adhere to the card front with small adhesive foam pads.
It sounds like a lot of work but none of the stages takes very long to complete. Thank you for visiting, I hope you like the card. All the supplies used are linked below.
Products Used
- White 12.5cm square blank card and envelope
- Turquoise card
- A4 Coconut White Foundation card
- Stencil tape
- Distress Oxide ink pads Broken China, Spiced Marmalade, Vintage Photo
- Foam ink blending tool
- Old Letter clear stamp
- Press to Impress stamping platform
- Tim Holtz layering stencil Trellis
- Dog Rose clear stamp set (for the leafy stems)
- Perfect Medium embossing ink pad
- Metallic embossing powder Gold Rich
- Sizzix heat gun
- Petal Trio clear stamp set (for the sentiment stamp)
- Butterflies stamp and die set
- Big Shot die cutting Machine
- Pure white vellum
- Memento Tuxedo Black ink pad
- Spectrum Noir Classique marker Satsuma
- Versamarker pen
- Double sided tape dispenser
- 1mm adhesive foam pads
- 6mm ultra high bond double sided tape

