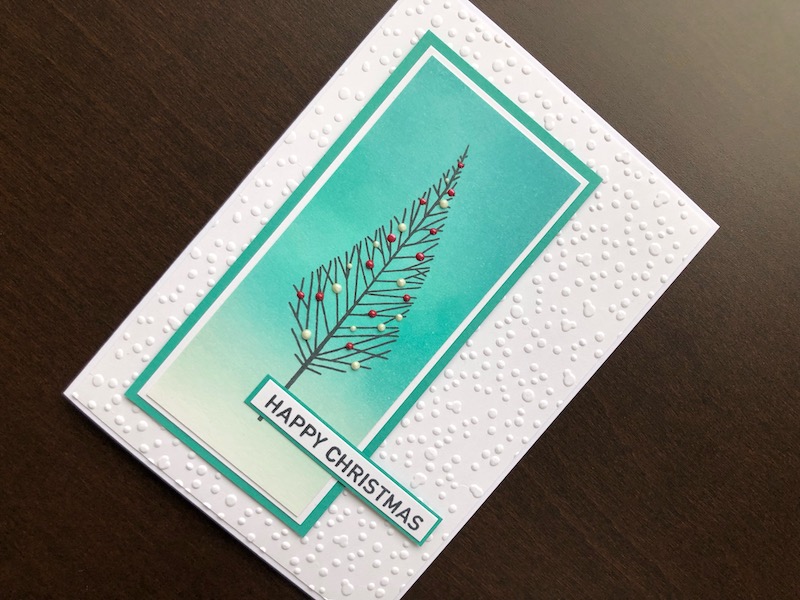
Hi Everyone, I really like the twiggy tree stamps that Woodware have brought out this year so decided to try one of them out. This one is the tall tree, there’s also a wider one
Hi Everyone, I really like the twiggy tree stamps that Woodware have brought out this year so decided to try one of them out. This one is the tall tree, there’s also a wider one and a round one but this seemed to work best for this design.

To Make the Card
Start with a white A6 blank card, cut a piece of white card slightly smaller and emboss it with the Falling Snow embossing folder. Adhere the snowfall panel to the card blank. Cut a piece of white card 5cm x 11.5cm use a foam ink blending tool to create an ombre background with darker ink at the top, fading to almost white at the bottom. Stamp the Twiggy Tree in black onto the inked panel. Use 3D pearl accents to add decorations to the tree, in red and white. Leave it to dry.
Stamp the Happy Christmas sentiment in black on a strip of white card and mount on turquoise card. When the pearl accents are dry, mount the panel on white, then turquoise card and adhere to the card front. Adhere the sentiment strip across the trunk of the tree as shown.
I really like the way this card turned out, there are lots of ways you could vary it too, by changing the colour scheme. Thank you for visiting, I hope you like it too. All the products used are linked below.
Products used:
- White A6 blank card and envelope
- A4 smooth white card
- Turquoise card
- Falling Snow embossing folder
- Big Shot die cutting machine
- Distress Oxide ink pads, Broken China, Peacock Feathers, Speckled Egg, Black Soot
- Foam ink blending tool
- Twiggy Tree Tall clear stamp
- Press to Impress stamp positioning tool
- 3D Pearl Accents, White, Berry Red
- Christmas Sentiment Strips clear stamp set
- Double sided tape dispenser
- 1mm adhesive foam pads

