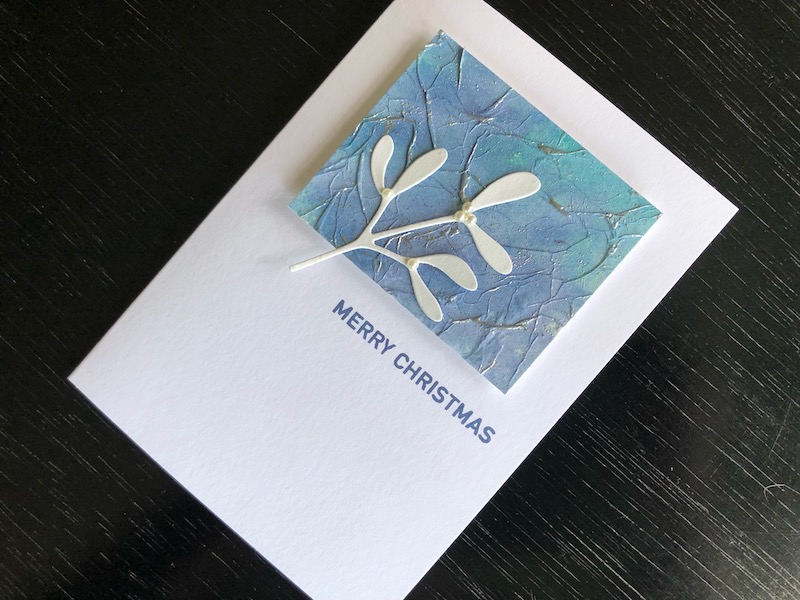
Hi everyone, the background panel for this card was made using an inked and heat embossed tissue technique. I haven’t tried it before but found it easy and the results are great. Read on to
Hi everyone, the background panel for this card was made using an inked and heat embossed tissue technique. I haven’t tried it before but found it easy and the results are great. Read on to find out how it’s done. I used Distress Oxide ink pads for this, but you can use any water based ink, paint or other substance. I also tried it out with water and Pixie Sparkles and that worked really well too, I haven’t made it into a card yet so watch out for that one.

Inked Tissue Technique
The tissue is standard white, packaging tissue paper that you can buy in the supermarket or gift wrap shop. Cut a single layer piece roughly 6″ x 6″. Smoosh your ink colours on to a craft mat covering an area about the same size as the piece of tissue. Spritz the ink well with water, then use a palette knife or similar and mix the colours slightly to avoid getting blocks of colour. Lay the tissue down in the wet ink. If some of the tissue remains dry use the palette knife to gently pat the tissue to spread the ink until it is all covered. Carefully lift the wet tissue by the corners and lay it on a piece of kitchen roll to dry out. It took about 15 – 20 minutes to dry.
Once the tissue is dry lift it off the kitchen paper and scrunch it up, then open it out but don’t flatten it completely. You want to get lots of wrinkles. Dust over it with an anti static pad, then lightly ink it with a Versamark ink pad inking only the ridges that have formed. Sprinkle with embossing powder, shake off the excess and heat set. If any embossing powder sticks to the flat areas brush it off with a paint brush.
To Make The Card
Cut a piece of the tissue to 7.5cm x 6cm, lay it on a A6 white blank card near the top and mark with a pencil where the bottom edge is. Stamp the greeting on to the card using the pencil mark as a guide to position it. Rub away the pencil mark, then use adhesive foam tape to adhere the tissue panel. Die cut a piece of mistletoe from white card, and add natural pearls for the berries. Glue the mistletoe to the tissue panel.
As the tissue panel has colour, texture and dimension very little more is needed to complete the card. I am delighted with the way the technique worked and look forward to using it again. I hope you like the card, all the supplies are linked below. Thank you for visiting.
Debbie x
Supplies used:
- White A6 blank card and envelope
- White tissue paper
- Distress Oxide ink pads Faded Jeans, Tumbled Glass, Wilted Violet
- Versamark ink pad
- Sizzix heat gun
- Winter Foliage die set
- Big Shot die cutting machine
- 3mm natural adhesive pearls
- Christmas Sentiment Strips clear stamp set
- Press to Impress stamp positioning tool
- 2mm adhesive foam tape
- Dries Clear Glue

