
Hi Everyone, I have made a few Christmas cards in traditional colours so wanted to try something more unusual for this one. It also gave me a chance to use the new Marianne Celestial Stars
Hi Everyone, I have made a few Christmas cards in traditional colours so wanted to try something more unusual for this one. It also gave me a chance to use the new Marianne Celestial Stars embossing folder for the background.

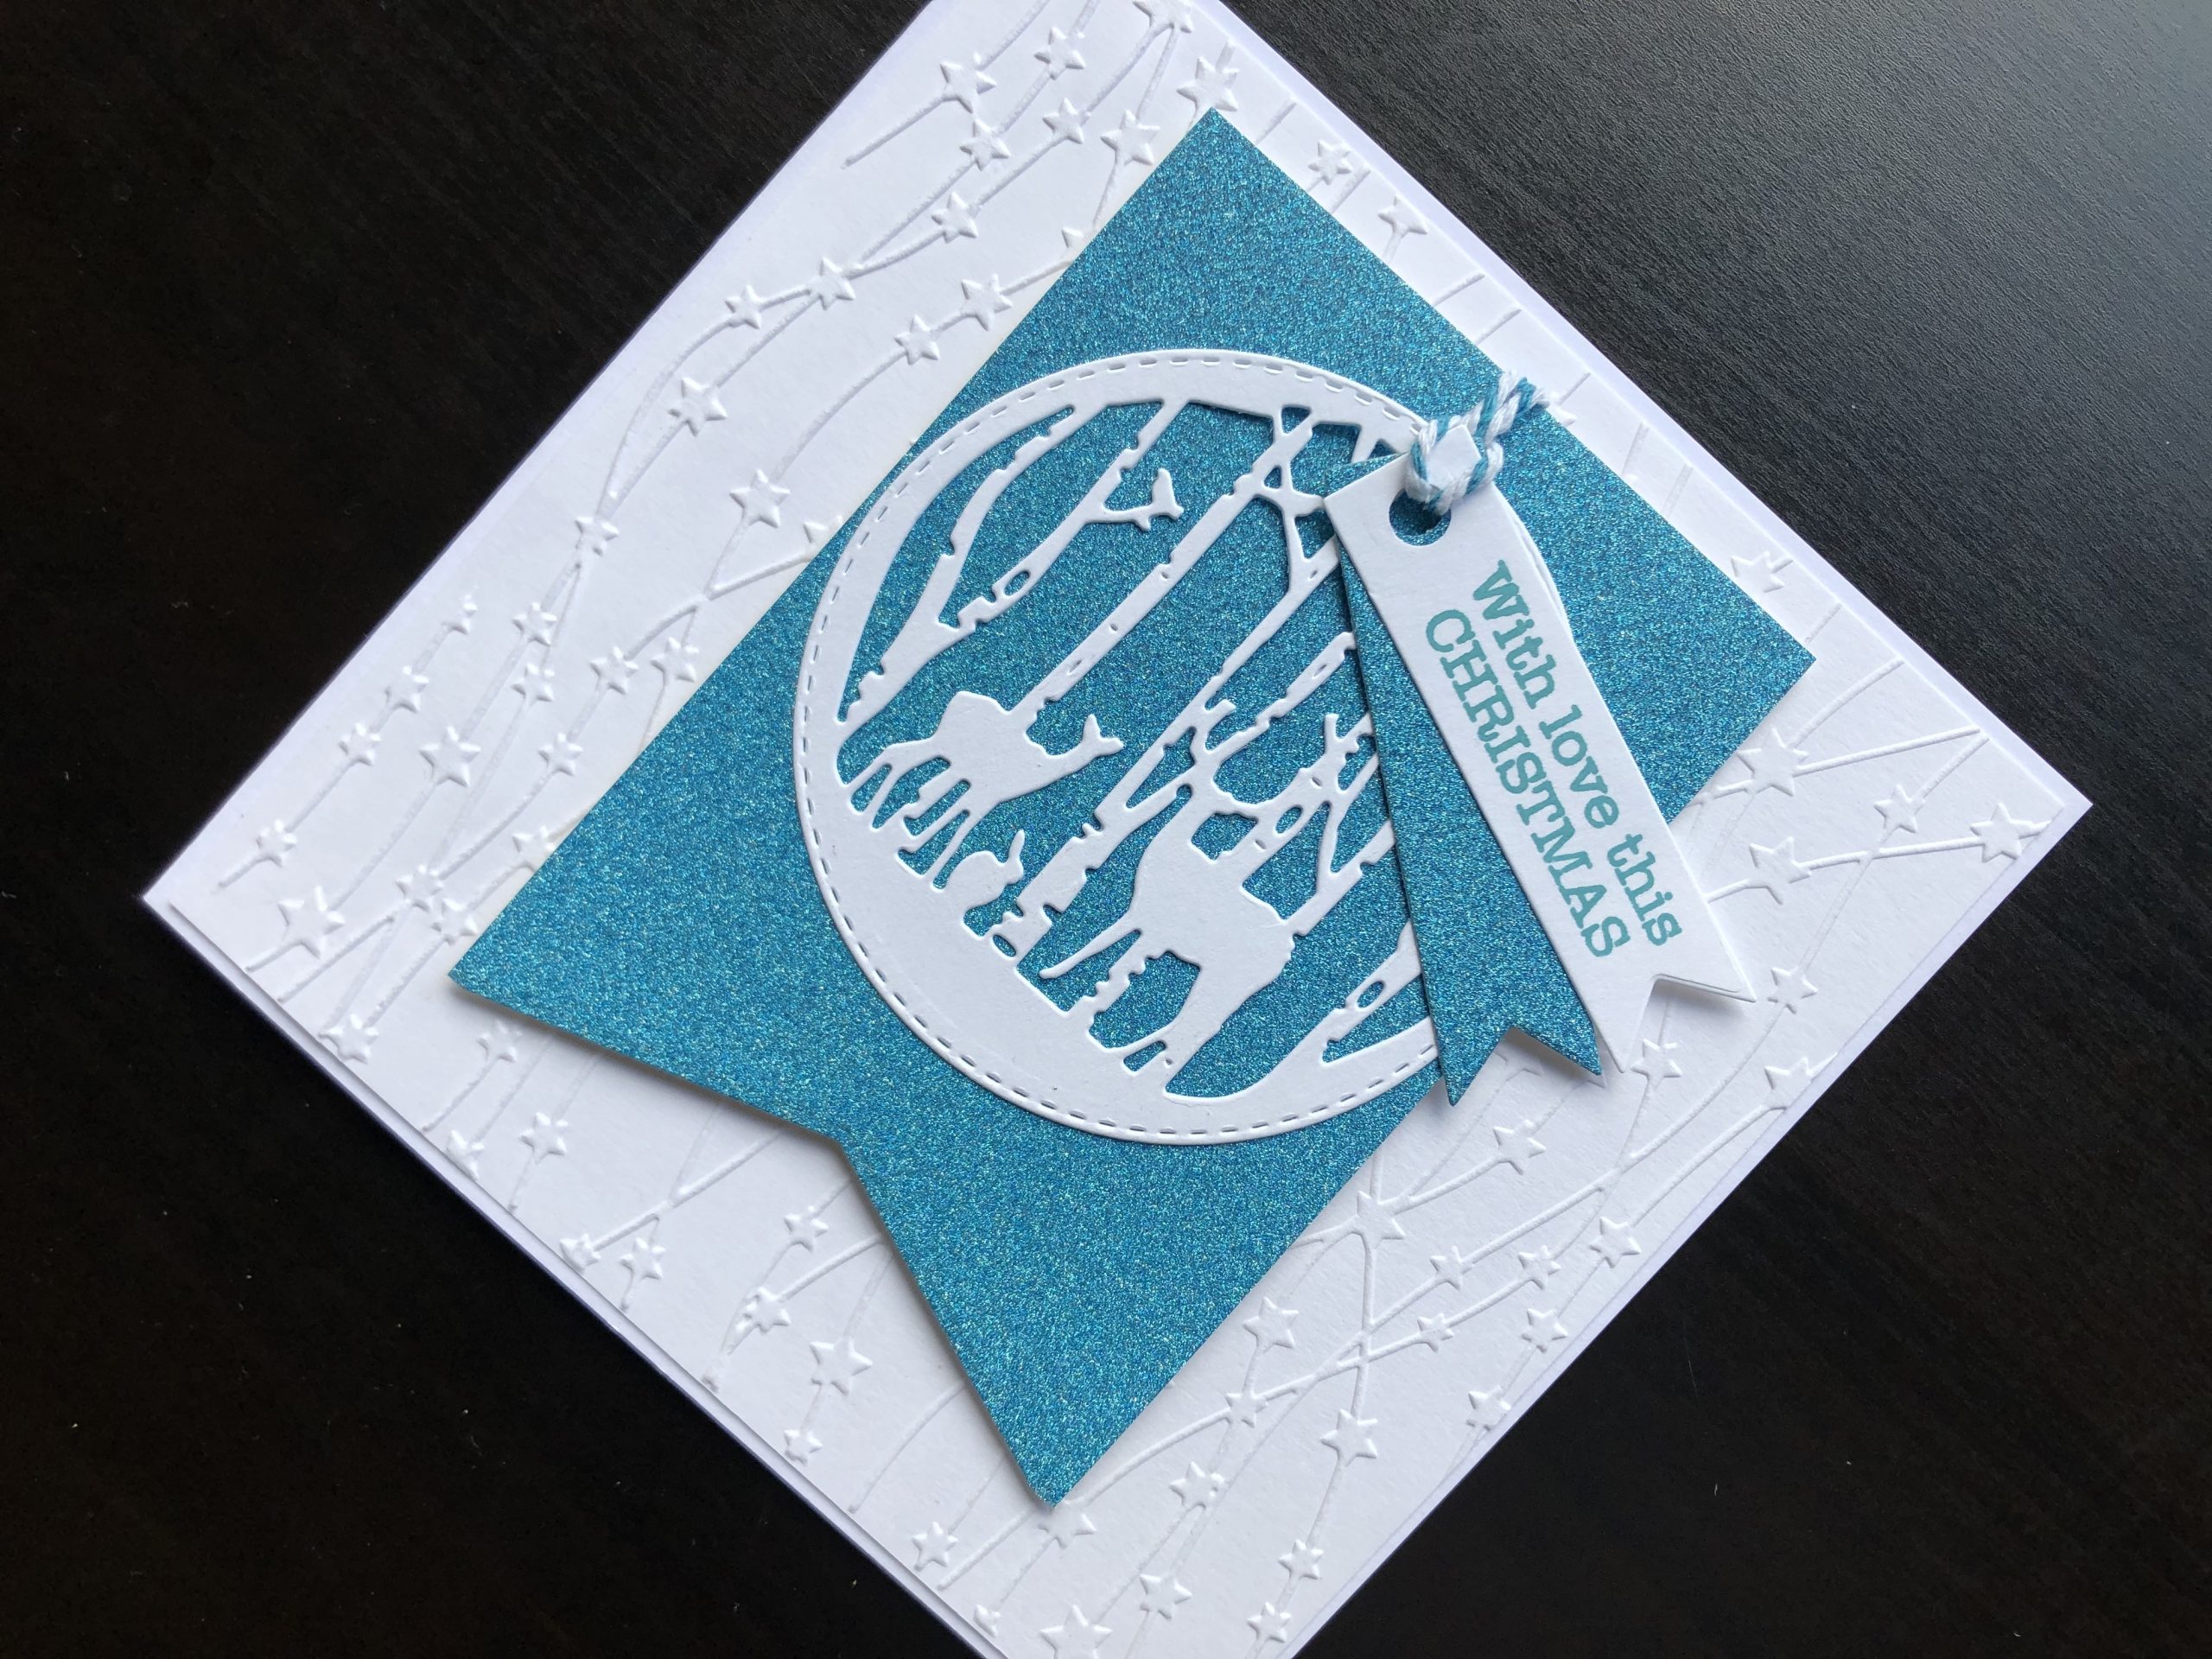
To Make the Card
Start with a white 6″ x 6″ blank card, then cut a piece of white card to 14.2cm x 14.2cm. Emboss the white card with the Celestial Stars embossing folder and adhere it to the card blank. Cut a piece of turquoise glitter card approx. 8.5cm x 12cm then use an edger die to cut an inverted V shape at the bottom.
Cut two pennant shapes one each from white card and turquoise glitter card. Punch a hole at the square end of each pennant. Use turquoise ink to stamp the greeting onto the white pennant. Die cut the winter forest scene from white card. Use a piece of bakers twine to loop through the two pennants and the top of the forest scene circle to loosely tie them together. Adhere the forest scene circle to the glitter card. Fold the ends of the bakers twine over the top of the turquoise card and secure in place with adhesive tape. Use foam tape to adhere the glitter card panel to the card front. Position the two pennants so that they are slightly overlapping and glue in place.
I love the look of the turquoise glitter card with the white and delighted to find that the Broken China ink pad matches it perfectly! Thank you for dropping in.
Debbie x
Supplies used:
- White 6″ x 6″ blank card and envelope
- A4 smooth white card
- Cool Tones No Shed glitter card
- Celestial Stars embossing folder and die set
- Sam’s Circles die set
- Tags and Labels die set
- Select a Size Edger dies
- Big Shot die cutting machine
- Modern Seasonal clear stamp set
- Broken China Distress Oxide ink pad
- Foam on a Roll foam tape
- Woodware craft glue