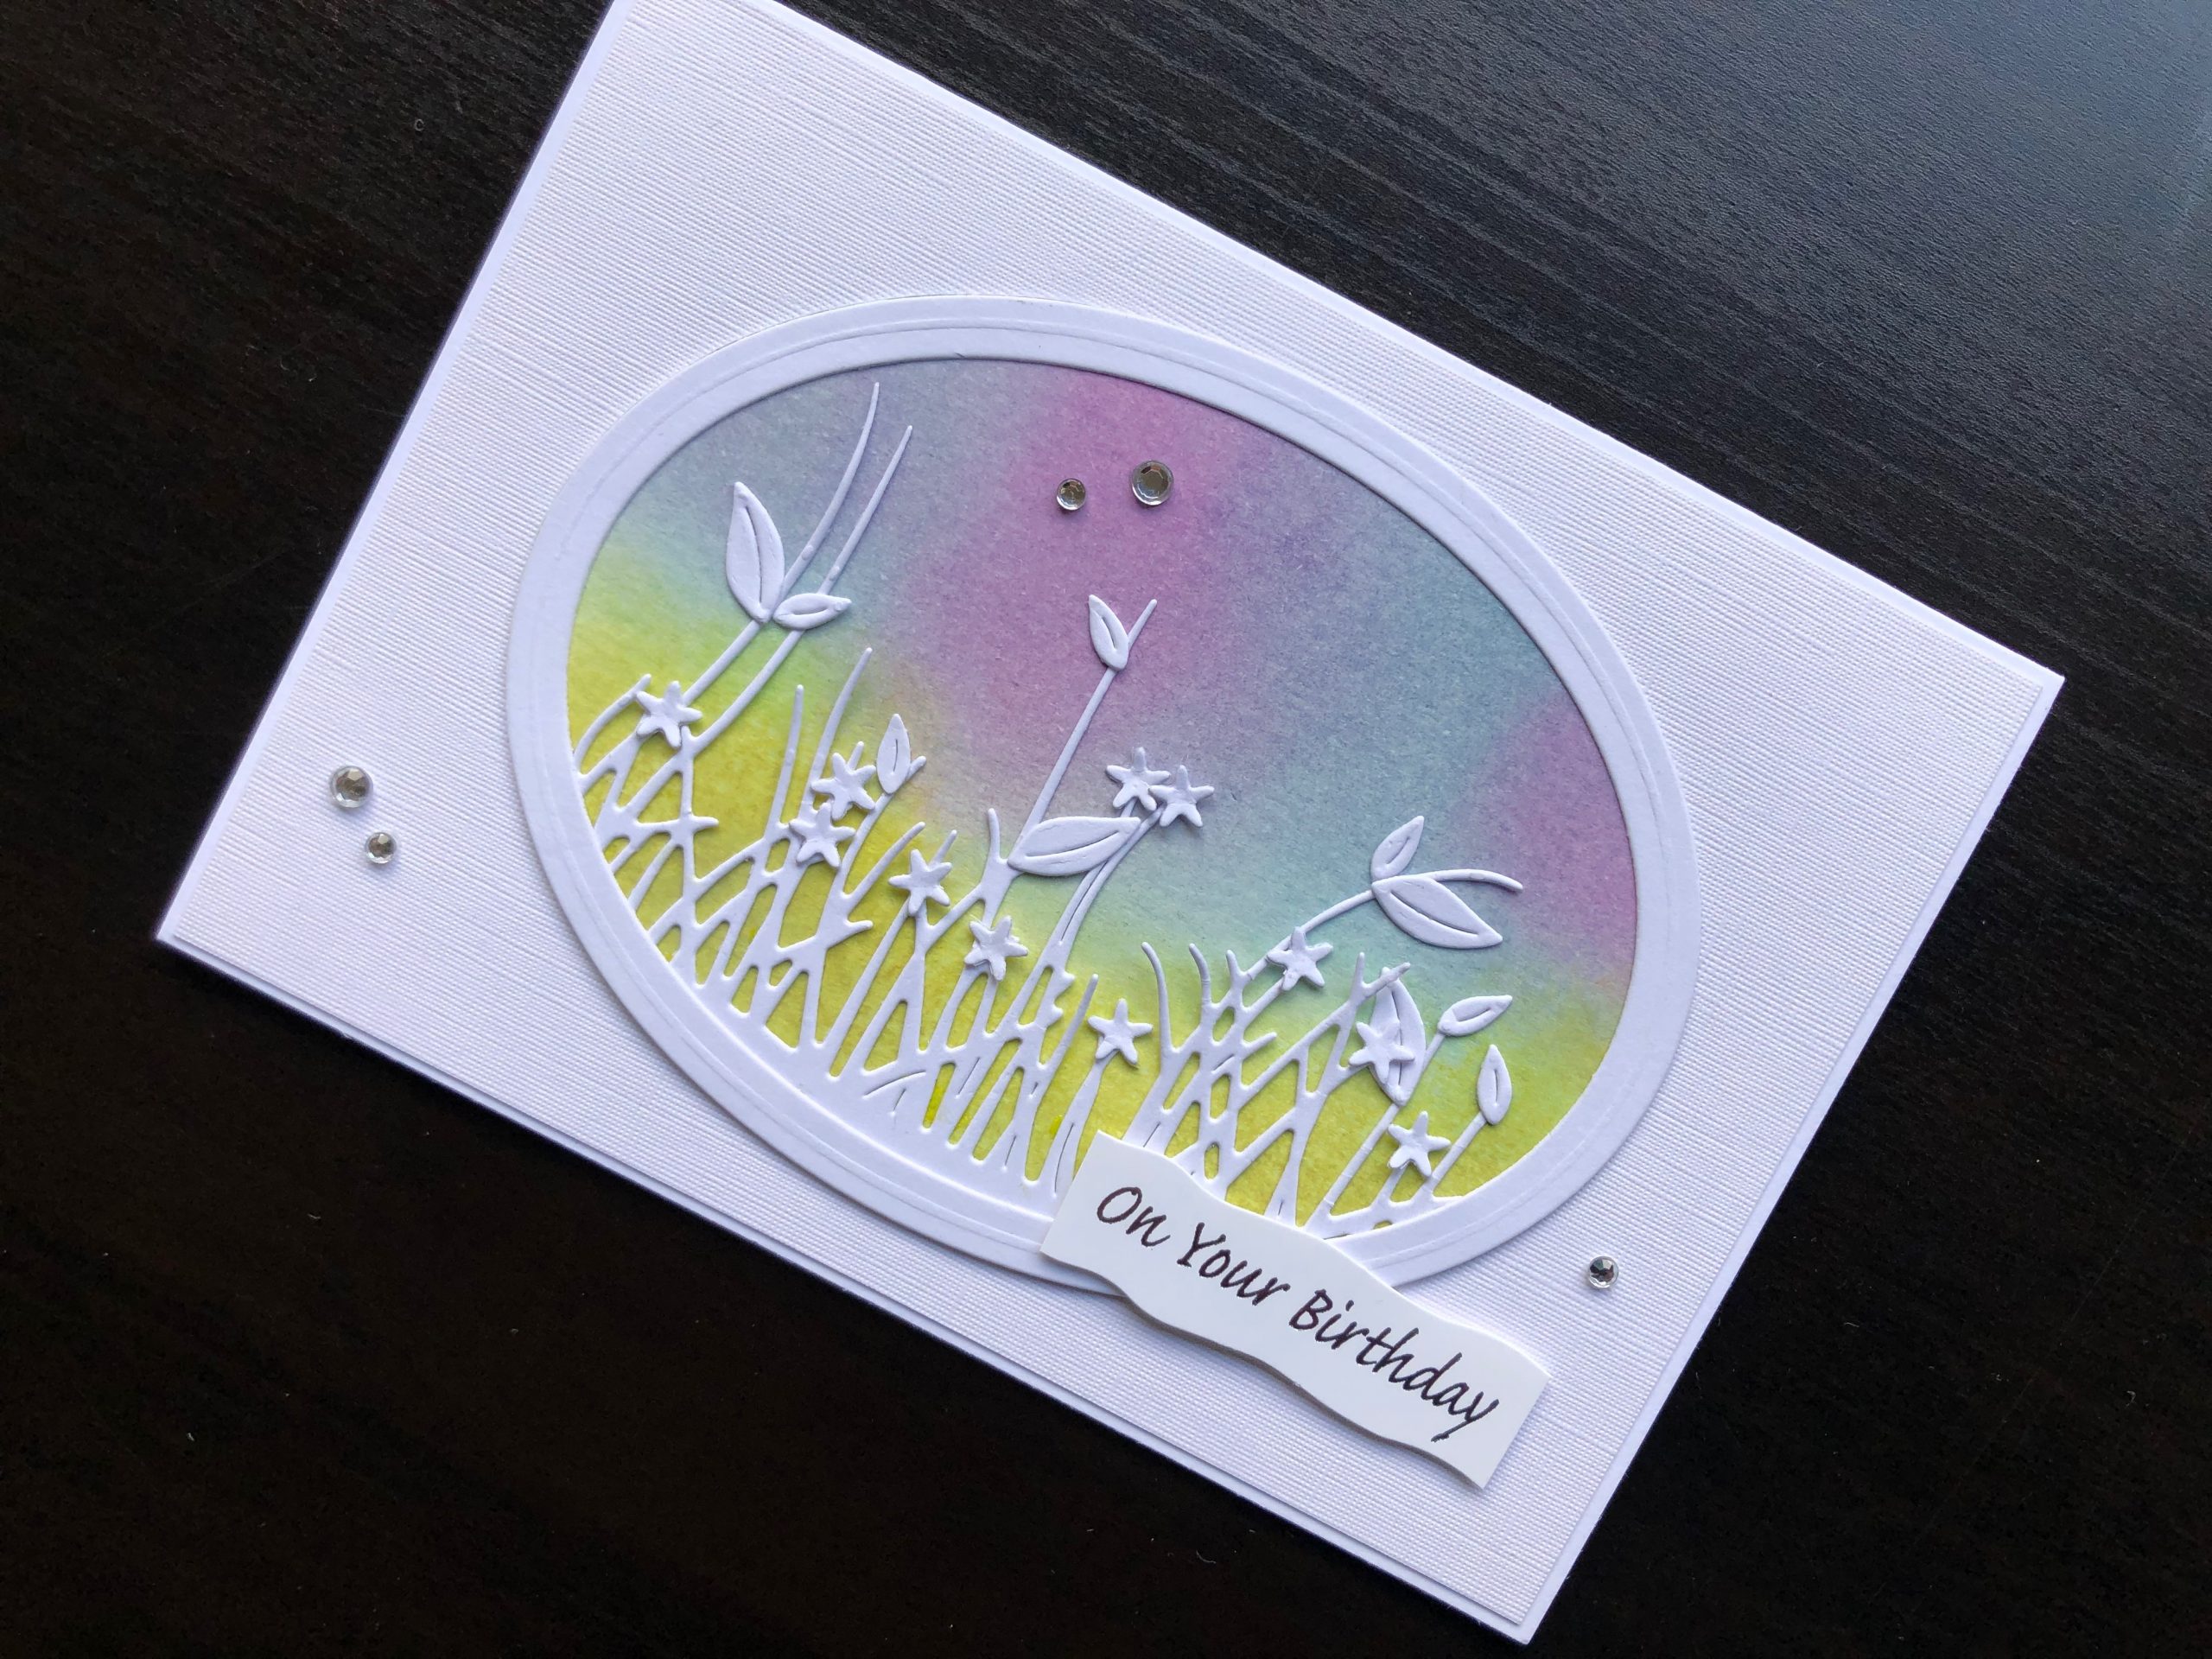
Springtime Border is a new Sizzix die which could be used in many different ways. Here I trimmed it down a bit to use it inside the oval frame. To Make the Card Start with
Springtime Border is a new Sizzix die which could be used in many different ways. Here I trimmed it down a bit to use it inside the oval frame.

To Make the Card
Start with a white A6 blank card, and layer this with white linen card. Die cut an oval of watercolour card. Using a foam ink blending tool create a background on the oval, to resemble grass and sky.
Die cut an oval frame from white card, using two sizes of oval die together. Also from white card, die cut the Springtime Border and trim the ends to fit the oval frame. Use the leaf die included with the Springtime Border set to cut some white leaves and glue them in position on various stems. Die cut some tiny white flowers and glue these in place on the stems as well.
Cut a birthday sentiment from the sheet, use a sanding block to smooth away any of the notches that held it in place. Use 1mm adhesive foam pads to attach it across the bottom right area of the die cut frame. Add a few self adhesive crystals for decoration.
I am very happy with this new die set and love the white on white look. I hope you like it too. Thank you for visiting.
Debbie x
Products used:
- White A6 blank card and envelope
- White linen card
- A4 smooth white card
- A4 Watercolour card
- Distress Oxide ink pads Twisted Citron, Peeled Paint, Picked Raspberry
- Distress ink pads Tumbled Glass, Stormy Sky, Dusty Concord
- Foam ink blending tool
- Oval Frames die set
- Springtime Border die set
- Tiny Flowers Die
- Die cut birthday greetings white and silver
- Sanding block
- Self adhesive crystals
- Big Shot die cutting machine
- Craft tacky glue
- 1mm adhesive foam pads

